Monday, December 3, 2012

Three Month Review

Just three months ago, we were getting ready to move in. We were still at my old bedroom in my parents house, all of our necessary stuff crammed in there with us; all of our less necessary stuff was crammed in a storage unit. Because I've been here every day, it seems like progress has been slow. Looking back at the pictures helps me realize that this has all happened pretty fast, especially considering I've done a lot of the work myself. I'm not bothered by working alone, as this has become my full time job. I have had help from family and friends, but only at their insistence. They usually appreciate being able to try out some home improvement project at our house before attempting it at theirs.

Again, I most often work without help because I see this as my job, and I will get paid for the work I do when we sell it. However, those renovating to improve the comfort of their home should never be without one thing: help. Sure, it can be done alone, but it sucks. The help of one person is great, three people is probably ideal. Even if there's just someone there to get tools and watch for unexpected issues, that's a great help. If you're not a bit manic (and even if you are) the extra effort required to lift, hold, assemble, and just plain do everything alone can quickly become exhausting. I will work feverishly to get something done, spending 14 hours a day for a few days, then upon completion realize that I am broken. I take a couple days off before the next project, but if I had a job to go back to the next day, it would be disastrous. At our last house, I remember trying to do projects while also working. I tried to paint the kitchen cabinets in two days, and naturally I barely finished and did a horrible job. They stayed like that as long as I was employed, because there was barely time to do them, let alone re-do them.

Anyways, here are some three month pictures from the house, along with a done/to do list. I'll take more official pictures after I clean up the house this week. No room is completely done, which is sort of depressing... but they are all getting close!
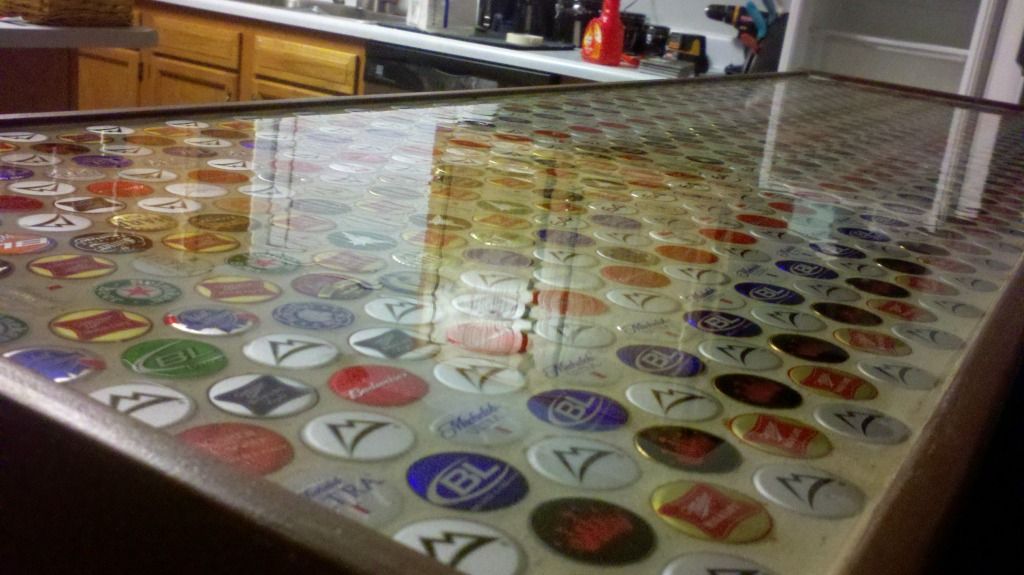
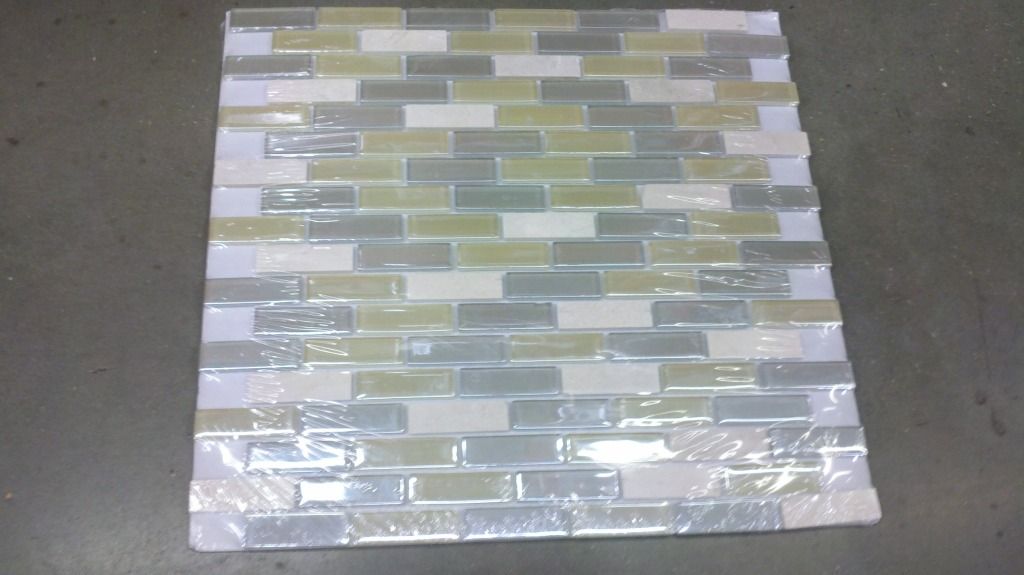
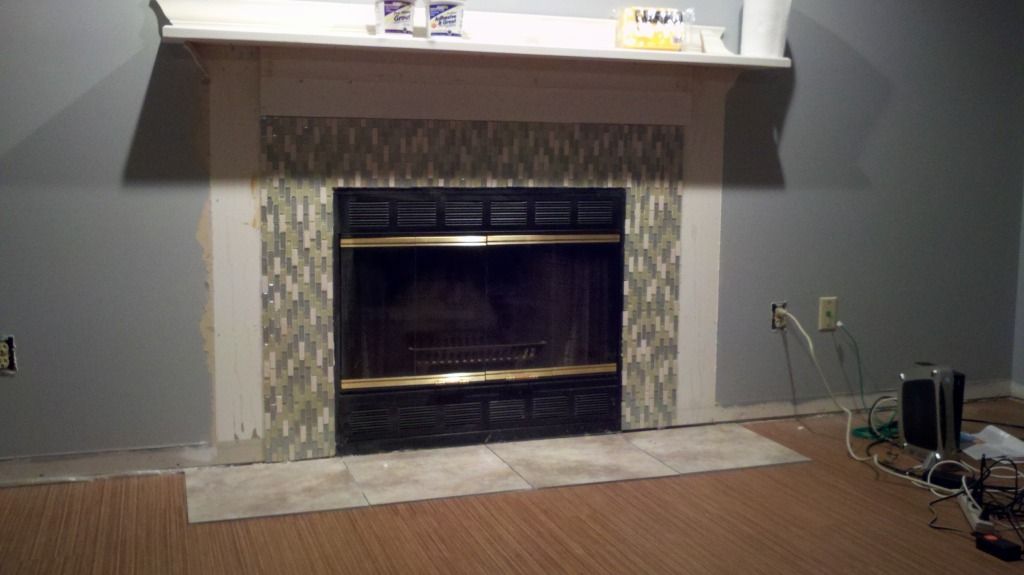
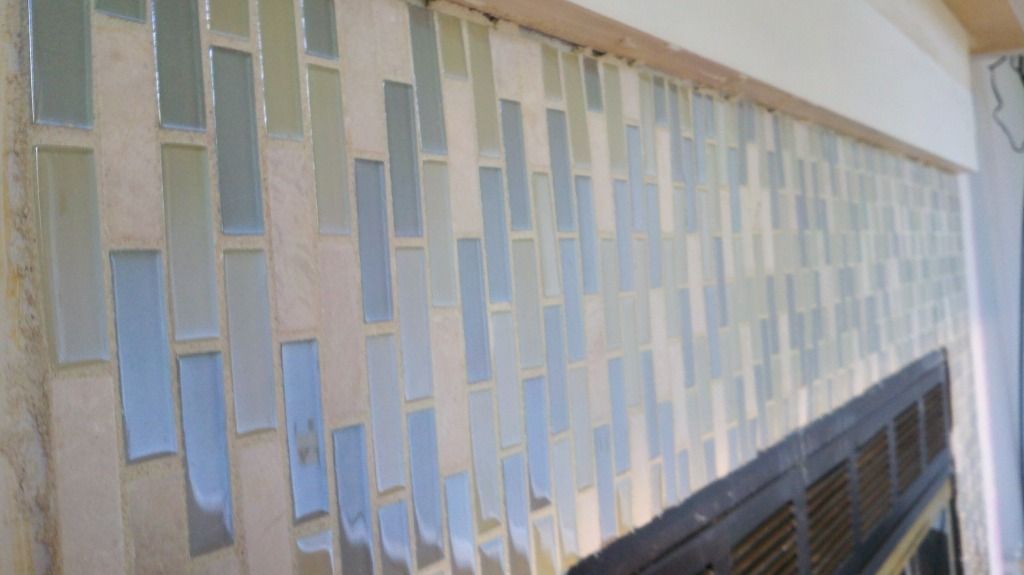
Kitchen/Family Room

Done: new appliances, new flooring, new light fixtures, renovated fireplace, new paint, new blinds and curtains, new vent covers
To Do: new countertops, wall art behind couch, paint cabinets, add new hardware, molding around island, caulk moulding, trim around fireplace, clean or replace fireplace spotlights, hang something over fireplace, add molding at door thresholds
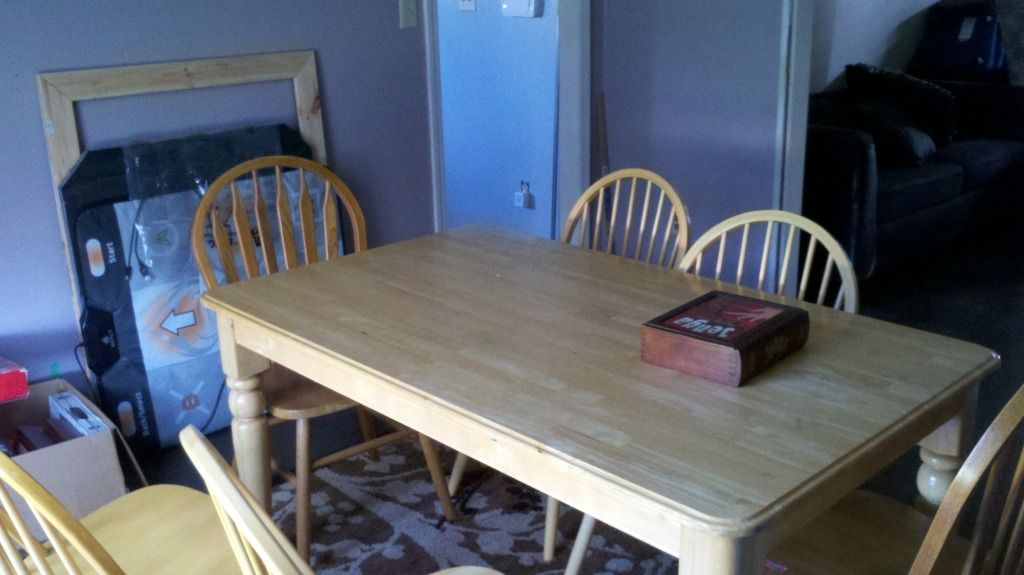
Dining Room
Done: New flooring, new lighting, new paint, new blinds and curtains
To Do: reattach door molding, caulk molding
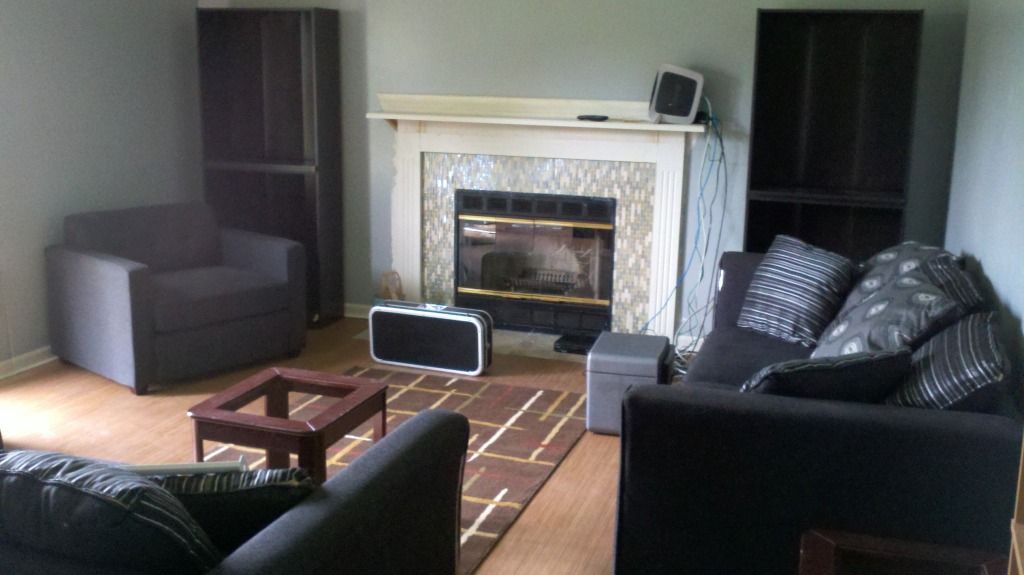
Living Room
Done: New flooring, new paint, new blinds and curtains, new thermostat
To Do: decorate bookshelf, add light switch, caulk molding

Stairs and Hallway
Done: new flooring, new paint, removed carpet, painted stairs, installed cabinets over laundry, new water heater, new lighting
To Do: Caulk molding, add design to stair risers, sand front lip of stairs, replace bathroom mirror, paint new light and mirror area, add quarter-round by front door

Upstairs Hall Bath
Done: new flooring, new lighting, new towel bars and toilet paper holders
To Do: paint ceiling and walls, fix shower, paint vanity, change vanity top (maybe), floor molding
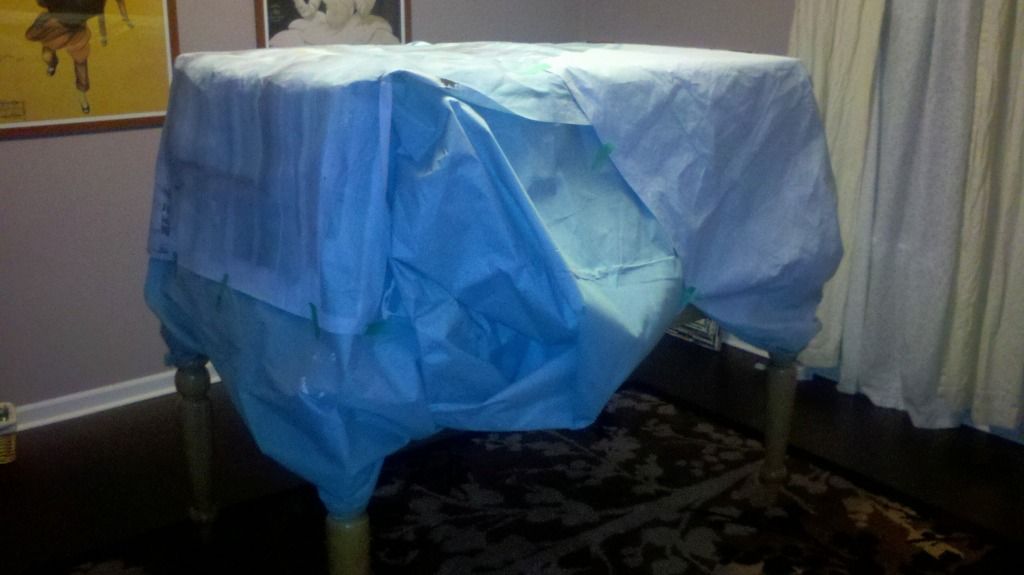
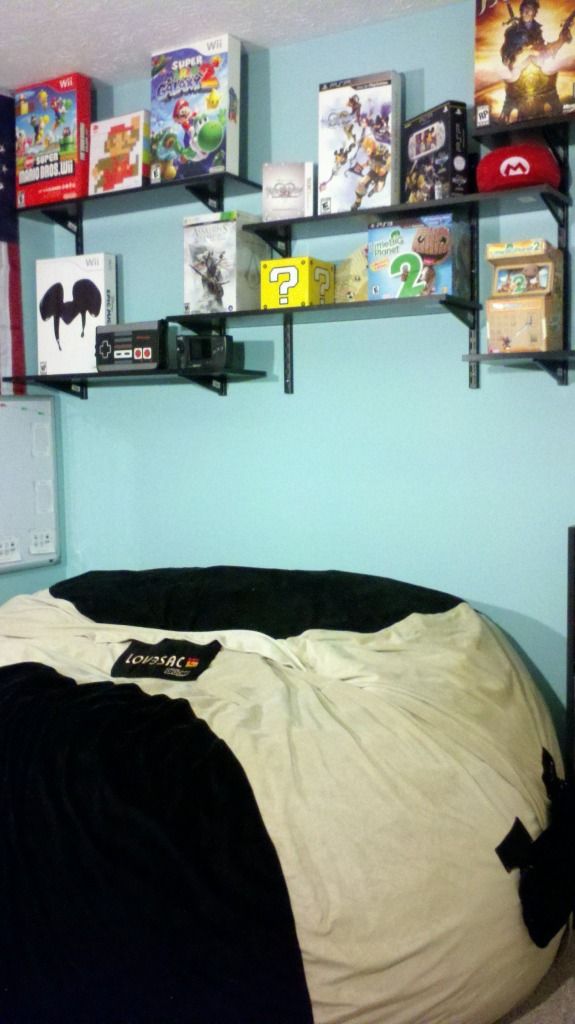
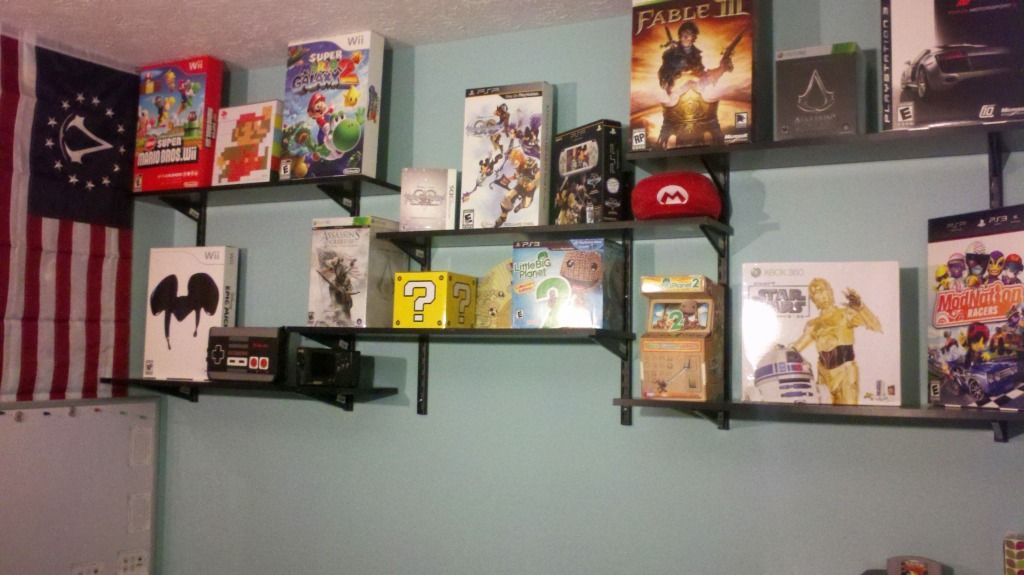
Game Room
Done: new flooring, new paint, track shelving, new vent cover, mounted TV, new blinds and black-out curtain, new sconces
To Do: add regular curtains, possibly move in mini-fridge, add lights to closet

Guest Room/ Office
Done: new flooring, new paint, new vent cover, additional closet shelf, new blinds and curtains
To Do: organize closet and desk, hang wall art behind sofa

Master Bedroom
Done: new paint, new lighting, new flooring, new vent covers, blinds and curtains, headboard wall art
To Do: outlet covers, re-patch wall, hang art

Master Bathroom
Done: new lighting, new flooring, new vent cover, new blinds, new towel bars and toilet paper holder
To Do: molding, paint ceiling and walls, install storage above toilet, paint cabinets, new vanity top, add tile above sink, investigate possible sewer smell :(

The Slippery Slope

We intend to remodel this house for profit, but it is still our home in the meantime. Sometimes it's hard to separate what we want from what we should get, because we'll have to live with it until we sell. There are some bigger projects, fueled by Pinterest inspiration, that would be too much of an investment of time and money considering we will move soon. Even if we were staying, its hard to draw the line at what is jsut right and what is excessive. Even stranger, once we have gone over budget on something, there a feeling that we may as well just destroy the budget, because it's already broken. Of course, this is a slippery slope.

I've begun looking at everything as percentages instead of dollars. Though a light fixture may be only $20 over budget, if the original budget was $40, that's a 50% increase. Items as cheap as a couple bucks are still subject to this rule. By ignoring whether or not I think we have the extra money for it and sticking to how much the percentage increases, it's easier to stay on track and not justify unnecessary spending.

 I also have to make some sacrifices on what I think it perfect versus what will work. I'm not crazy about our bathroom floors, but they were way under budget and objectively look great. I may not have gotten them if we intended to stay, but they were perfect for updating. Though some of those touches or fancier finishes would be nice and might help sell the house, they are unlikely to increase its value. The common saying "if it isn't broke, don't fix it" has become our motto as we continue to finish renovations. As much as I would like built-ins next to the fireplace, a glass mosaic and steel tile backsplash in the kitchen and a completely new master bath, none of these things are necessary.

Sunday, December 2, 2012

Time Out

Christmas is coming, so most of our renovation funds have gone to gifts lately. Being completely sick of cleaning and organizing, I've turned to completing some unfinished crafts.


I started this t-shirt blanket for my sister ages ago. It's much bigger than I thought it would be. I added bias tape to the edges, but don't like how it tuned out. I'm not sure if I'll buy different tape or just hem it.

I'm also making a T-shirt blanket for myself from all my GameStop T-shirts. I want to make one big enough to cover the Lovesac, but I don't think I have the space to properly construct something of that proportion. I took pictures of every shirt today so I could assemble the design on my computer. I'd prefer to lay it out by hand but I don't have a flat surface that big. Well, not without moving a lot of furniture. I laid a few out on the floor today just to see what they would look like as a blanket.


I made some pillow cases from fabric I had laying around. Aaron received a coffee gift basket that had a folded burlap sack as packaging, and I sewed that into pillows as well. The burlap was a bit unwieldy to sew. I just stuffed in a pillow that no longer matched our decor. The pillow on the left is identical to the one I stuffed into the burlap on the right. They tuned out better than I expected!


I've made quite a few duct tape wallets as well. I've made lots for friends, family, and for myself. I just make them for fun, but I get complements on them often. The typical style I make is pictured below. There's a slot for cash and a hidden pocket behind the three interior pockets on each side. I intend to sell some online sometime soon, probably on Etsy. I need to do a little more research and set up accounts to make that possible, so that may be a while. 

Wednesday, November 28, 2012

Bathroom Flooring Part Two


I moved on to installing flooring in the master bath today. I started by cleaning the existing vinyl, which was disgusting. I cleaned the other bathroom's floor, but it wasn't nearly as dirty. Just like anything else, the floor looked a lot better once it was clean. The cleaner I used worked great, but it was toxic. Despite being late November in Indiana, I opened the window for air. 


Laying the floor was even quicker than yesterday. I was done in a couple of hours. All that's left is quarter round and doorway transitions.

Even though knew the toilet in the master bath would be hard to move, I uninstalled it by myself. I figured that not needing to lift it into a tub would make the task manageable. I would have been correct if the bolt wasn't rusted on. 


After a big mess in the shower and a lot of WD40, the bolt was freed. Harder than that was reinstalling the toilet. I made another mess but got it back on. It flushes fine, but Aaron and I will probably keep an eye on it. The hall bath toilet is still in the tub waiting for Aaron's next day off.

Tuesday, November 27, 2012

Bathroom Flooring Part One

We bought vinyl plank flooring the for the upstairs bathrooms at Home Depot on Black Friday. I'm not crazy about the color or wood grain, but it was half off and we aren't picky. I installed it in the hallway bathroom today. I made a bit of a mess in the process, but got it done pretty quick.

I moved the toilet by myself, which was ill-advised and very difficult. I'm not confident I can it back out of the tub on my own. We installed a stick-down vinyl plank for my grandmother a few weeks ago. It was easy, but the glue got an over our hands and the seams did not get as tight as I would have liked. That floor was only 99¢/sq ft, so it's a great option for cheap and fast update. However, that is also what we paid for these floors on Friday.

The box says "easiest floor ever" and I just might agree. Overlapping flaps stick to adjacent planks, making it a floating floor. It was a lot easier to put down than click-together flooring, especially around the door frame. My fingers often hurt after installing tongue-and-groove or click-together floors from trying to pull the seams tight. The planks could be repositioned after placement as long as I didn't push down too hard. To cut the floors, you score the front with a utility knife & snap it. This works for curves too, making the cut around the toilet drain a cinch.


Even though I don't love the pattern on the floor, it looks good finished. I'm now more motivated to get the vanity painted; its basically the same color as the new floors.

Monday, November 19, 2012

After party

The housewarming party was the first time we had more than 10 people over. We had around 40 this weekend. It didn't go exactly as I planned, but I think I'm the only one who knew. I was rather stressed about the whole thing, because my home is my workplace, and the improvements are my job. Therefore, the party was like inviting all my friends and family to my job, then compelling them to examine my work. Additionally, Aaron worked overtime this week, and wasn't able to help prepare as much as he anticipated. 

I would insert some pictures of the party here, but I was so busy I didn't take any. I made most of the food, which was a brand new challenge for me. In the end, it wasn't too difficult, just stressful. I also don't think I'll do that again. I had never cooked for more than 4 people. The hardest part was estimating how much 40 people would eat. The answer is a lot. 40 people eat a lot. As much as two people 20 times over,or a couple weeks worth of meals for Aaron & I.

We had a couple friends come late, which gave us a great way to unwind after the chaos of the party. We played board games and grazed on party leftovers. During the party I spent most of my time watching over the kitchen, so it was nice to finally relax. We don't anticipate throwing a housewarming party ever again, since we intend to move somewhat often. Overall, this one-time party was a success. 

Now that the party is over, its time to start the winter projects: cabinet refinishing, new countertops, bathroom flooring, and final painting. It's only been a couple months, but time is moving fast. Our realtor has already found a new house he thinks we would like. The thought another house is a little exhausting right now. I would rather him find a buyer for this house first.

Friday, November 16, 2012

Enviro-tec Lite


Our bar has been a multi-year project, starting when Aaron was still in an apartment and almost finished now, in our second house. We finally coated the top of the bar with Enviro-tec Lite, an epoxy resin. It is fantastic. I want to stress that one more time: it is FANTASTIC. It did not go perfectly, but it did go so well that I feel I will be using enviro-tec lite often in the future. I imagine that on a smaller project, it would be a breeze.


It was difficult to try to keep it dust free while we worked (spoiler - we failed a little) but it still looks great. This is what we rigged to allow it to cure undisturbed: a coffee table on top of a dining table, wrapped in drop cloths.


Because of the differences in depth between the grout and the bottle caps, the epoxy isn't completely smooth on top. There are some spots where it didn't completely cover the caps, and some random hairs and rough bubbles. We may coat it again, but the coating being a bit shallow gives a nice effect. It feels smooth to the touch, but in reflected light you can see the outlines of all the bottle caps in the slightly uneven coating. It keeps a little of the texture of the uncoated bar, which we liked but was not very durable. We also think it is a nice way of getting a tile look without a tile texture. 

Party Prep

Today is the last day before our Housewarming Party. This will be our one and only Houeswarming Party, since we intend to move rather often. We never had one at the last house because we got married around the time we moved in, and felt it a bit redundant.
We decided to make the food ourselves, which still mostly seems like a good idea. We don't know how many people are really coming, and we invited quite a few. There's going to be at least 35, but we think it might get closer to 55 when everything is said and done.

We're making BBQ chicken and a ground beef chili, both in slow cookers. In addition we have lots of sides and salads, as well as chips and snacks. If we don't have quite enough, we are sure there will still be enough for everyone to snack on. If we have way too much, well... it's food so we'll just eat it ourselves.

This is the first party of this scale we have ever had, so it's more work than I expected and a bit intimidating.

Garage Shelving


There's been a lot of shelving in our lives lately. These were a birthday gift from my Grandma. A strange gift, I know, but I told her and my parents that what I really wanted for my birthday was the ability to park in the garage before it got too cold. My parents bought me a garage door opener which took weeks to get installed. After a few trips to Goodwill and one to the dump, we finally parked both of our cars in the garage last night.

But back to the shelving: these two sets came from Home Depot, for about 60 dollars a set. The uprights have lots of holes so you can make the shelves whatever height you'd like. The bars that hold the shelves have metal tacks attached, so you just slide them into the holes at the correct height, and voila: super sturdy shelves. What we like best about these is they required no tools or hardware to assemble, which means they will be easy to move, and we can assemble them quickly in a storage unit to hold boxes.I may buy two more sets, and forgo a work bench for more storage.

The Little Things


Lately we have been accomplishing a lot of little things that have made a big difference in the house being complete. One of those things was vent covers. The ones we had were dirty and smelled like smoke, and would have taken forever to clean. When we decided to return the new vent fans for the bathrooms, we bought new covers for the rest of the duct work in the house instead. They were more expensive than I would have liked. Its a simple thing, but we are more excited about it than much bigger projects. It's little things like this that no one will appreciate as much as we do.
 

Time Marches On

We have worked on small projects while continuing to unpack and find a place for everything. We bought replacement vent fans for the bathroom, but after trying to install one we decided it just wasn't worth it. We were unaware that they were attached to the rafters, and since changing them was a style choice anyway, we're just going to clean and possibly paint the ones we have. We may still need to replace the one in the downstairs bathroom. I asked Aaron if he kept the fan he took down, and though he said yes it is nowhere to be found. The bathroom has no need for a fan anyways, so I'm not sure if we will replace that one or not.

We've planned a housewarming party , so we have divided our project list into pre- and post-party.

Pre-party:
Caulk and sand downstairs molding
Install floor transitions downstairs
Finish organizing garage
Move in futon
Finish unpacking/organizing/donating
Re-attach door frames and kitchen cabinet

Post Party
Refinish cabinets in kitchen
Refinish cabinets in bathrooms
Paint bathrooms
Replace gutters
Repair siding
Lay new flooring in upstairs bathrooms

As much as I would like for that to be the complete list, I'm sure there are projects I'm forgetting.

Game Room Shelves

They aren't anything fancy, but I've finished hanging shelves in the game room. I used black double slot track shelving with black supports and shelves, all of which came from Menards. The back wall in total cost $70.


Originally I thought I would do something more custom, but these were functional, modular, cheap, and easy. From start to finish it took only an hour, whereas building something myself would have taken an entire day, if not a weekend. I intended to have two shelves running all the way across, but due to some quick and incorrect math, the shelves were each about an inch too long for the wall. With Aaron's help, I rearranged the shelves so I wouldn't have to cut them. I like it more than the original concept. 


I still have a little bit of adjusting to do before this room is complete, but it's good enough for now. Its a small room, about 9'x8', and it is somewhat intimidatingly filled with gaming stuff. Have I mentioned Aaron doesn't play games at all? Seeing it all in one small room allows be to fully realize the truth about my gaming habit: It's excessive. But as I told Aaron: "I'd be ashamed if I wasn't so proud."

Tuesday, October 16, 2012

Unpacking

There have not been any posts lately because we have been working on the tedious task of unpacking. This house is a little smaller and without a cold storage room like the last house. Though it's just the two of us, that storage closet was mostly full. As we are often told, we have a lot of stuff for just two people. I'm starting an aggressive donation pile to help get things cleaned up.

The stuff in storage wasn't all junk. We kept blankets, comforters and pillows in storage bins as well as boxes, paint, sleeping bags, and extra seating. We intend to add plywood flooring to the attic above the garage, but we don't have one of those pull down ladders, so I have to hoist myself up from a standard ladder. Aaron randomly knows about floor joist requirements, and said they are only adequate for storage. Begin half his weight, all attic projects will be up to me.

Originally, we assumed we would stay for a year, but now we are considering staying only six months. Knowing we may move again in a few short moths is great motivation to get rid of clutter. What's more amazing is that I already got rid of a lot of stuff before we moved. We also want to buy more plastic storage bins, as they are sturdier and more reusable than boxes. They are also easier to stack, which will make moving and storage easier.


Sunday, September 23, 2012

Fireplace: Part Two

Once we had repaired the drywall, it was time to tile the surround. I was excited for this project because it is easy and makes a big impact. We chose this tile, primarily because it was on clearance for $4 a square foot.
We started placing it vertically, trimming the tiles as needed with glass snips. With the help of a friend the tile was up in under an hour.
I grouted the next day. There's more finish work to be done, mostly reattaching trim and cleaning up.


Moving days

We thought we would move in one week after we bought the house. We pushed it back because we didn't have hot water, weren't completely done with all the projects we wanted to do, and we were getting pretty exhausted. Sometime in the middle of week two I started clearing out the odds and ends from the storage unit to prepare for the big move.


We chose to move with one big U-Haul truck and the help of one good friend. On Friday, after 14 days of home ownership, we started loading up the truck at 8:00 am. Everything fit in one trip, but only because we rented the biggest possible truck. My dad later commented that we have a lot of stuff for two young people. We finished loading around 11, ate a huge brunch at IHOP and began unloading around 1pm. We had everything off the truck around 3pm. Luckily, most of our furniture was light and we put a lot of stuff in the garage. We had our stuff in the house, and we stayed there that night. We still didn't have hot water and everything was in complete disarray, so we didn't really start staying at the house for another week.

Over the next couple days we got the furniture moved where we thought we wanted it and stated to get boxes unpacked.


Since we fully intend to move again in a year, we are saving all of our boxes. As much as we have been able to unpack, we are not all the way there yet, and our garage is still a disaster. the office has become the official room of unsorted things.


There's no easily accessible storage in this house, so the items from our storage room are awkwardly finding new homes. Even after clearing out the storage unit, there were items in our room at my parents house that still needed to be moved, which I tackled myself on the following Thursday. It took three weeks, but we are actually living in our home now.

Tree Trimming

The tree in the front of our house had branches that nearly touched the ground, so we decided to trim it up above our head level. The branches were sagging quite a bit, so we were cutting higher on the tree than we expected.
We used a folding saw, a chain saw, and eventually a ladder to limb up this tree. It was nice to get out of the house for a while, and it only took an hour or so.
I trimmed up the trees in the back after cutting the grass. We were considering taking the trees out, but they probably belong to the neighbor.
The limbs on this tree were completely touching the ground. There was another tree growing in between it's branches that I cut down. I don't think the neighbor will notice.